Through the miracle of modern Photoshop, we can take a very basic camera raw image and achieve a more pleasing look. The raw image is much like a photographic negative. There isn't anything "final" about it. It's just a array of stored numbers. Adjusting contrast, color and how the numbers are to be placed is all part of the artistic interpretation. There is no right way or wrong way to interpret the image. Only the way that the artist or photographer chooses to share the image with the viewer.
"Did it actually look that way in real life?" Yes it did. It's how "I saw it." Those who were with me when I shot the picture just happened to see something else, but that's perfectly OK.
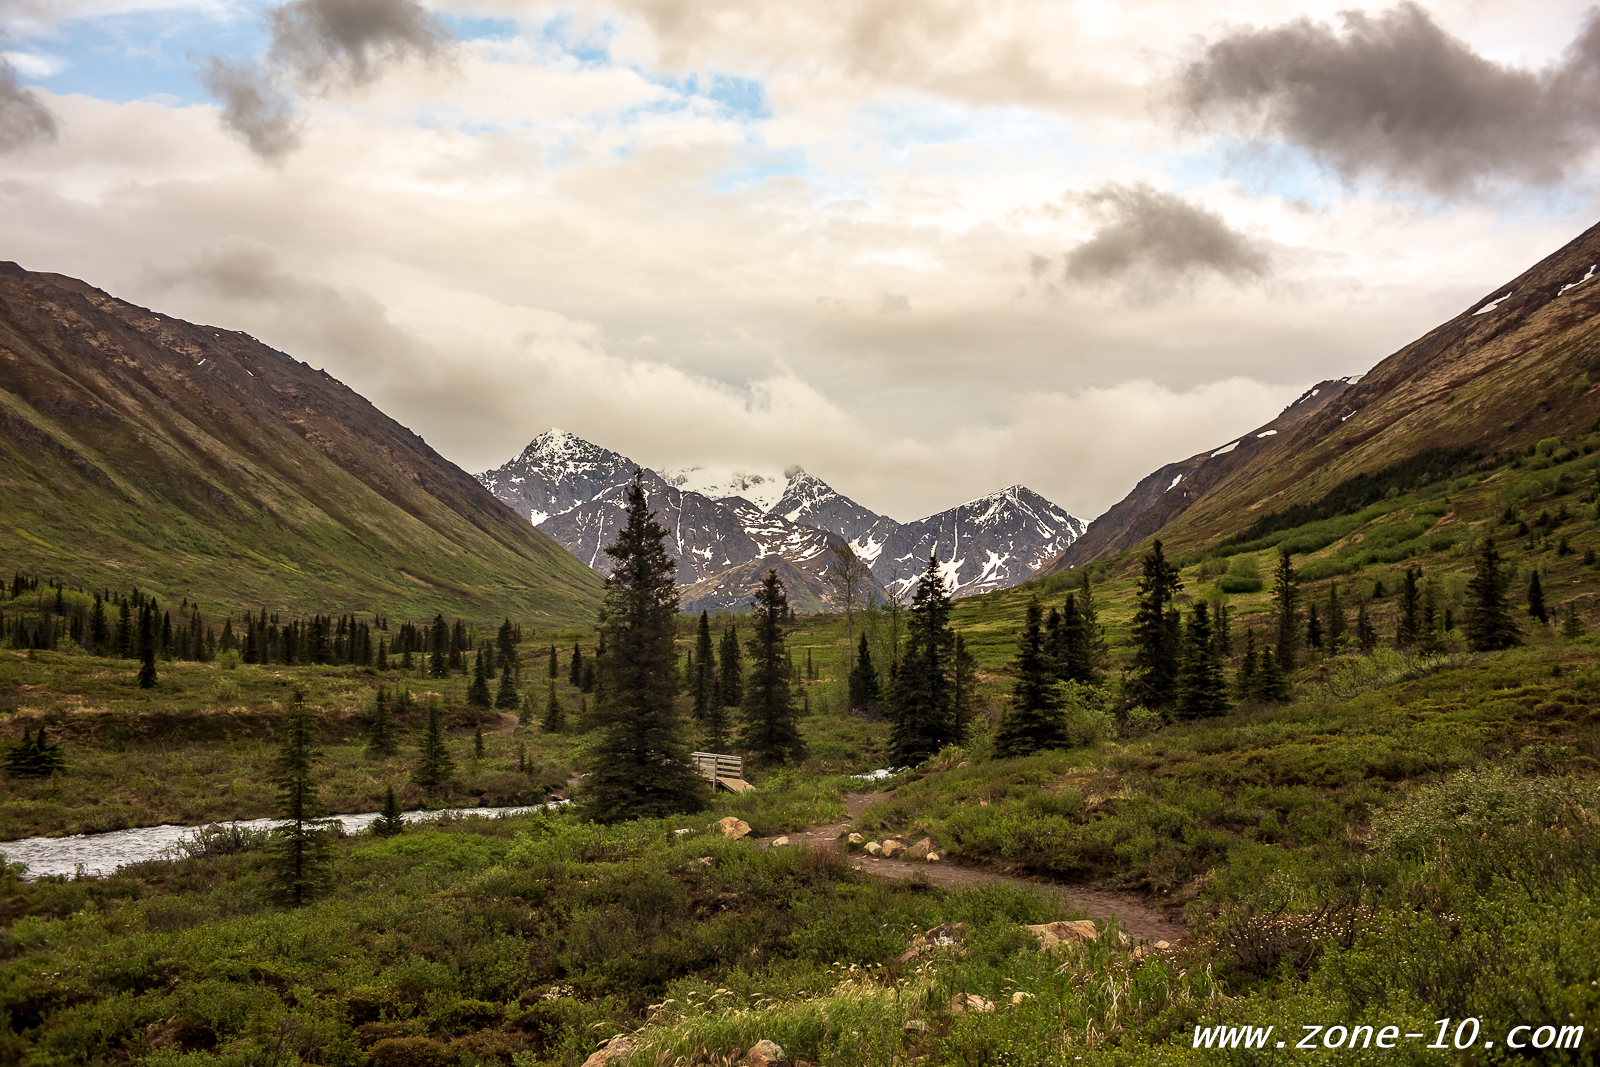
Technical details: The photo was taken with the Canon 6D and OM Zuiko 35mm F2.0 lens. I adjusted the exposure to make sure that the highlights didn't clip or wash out. I can deal with the shadows, but the sky is a pass-fail kinda thing.
Processed in Adobe Lightroom. I used "Adobe Landscape" for the profile and pressed Auto WB and Auto Tone. That was the starting point. From there, I made minor adjustments in sharpening, clarity and lens-specific corrections. Nothing radical at all. I normally get more radical. This photo should be considered a "rough draft" edit as a final version would experience significantly more editing, but I wanted to illustrate what can be achieved with very minimal effort in Adobe Lightroom.
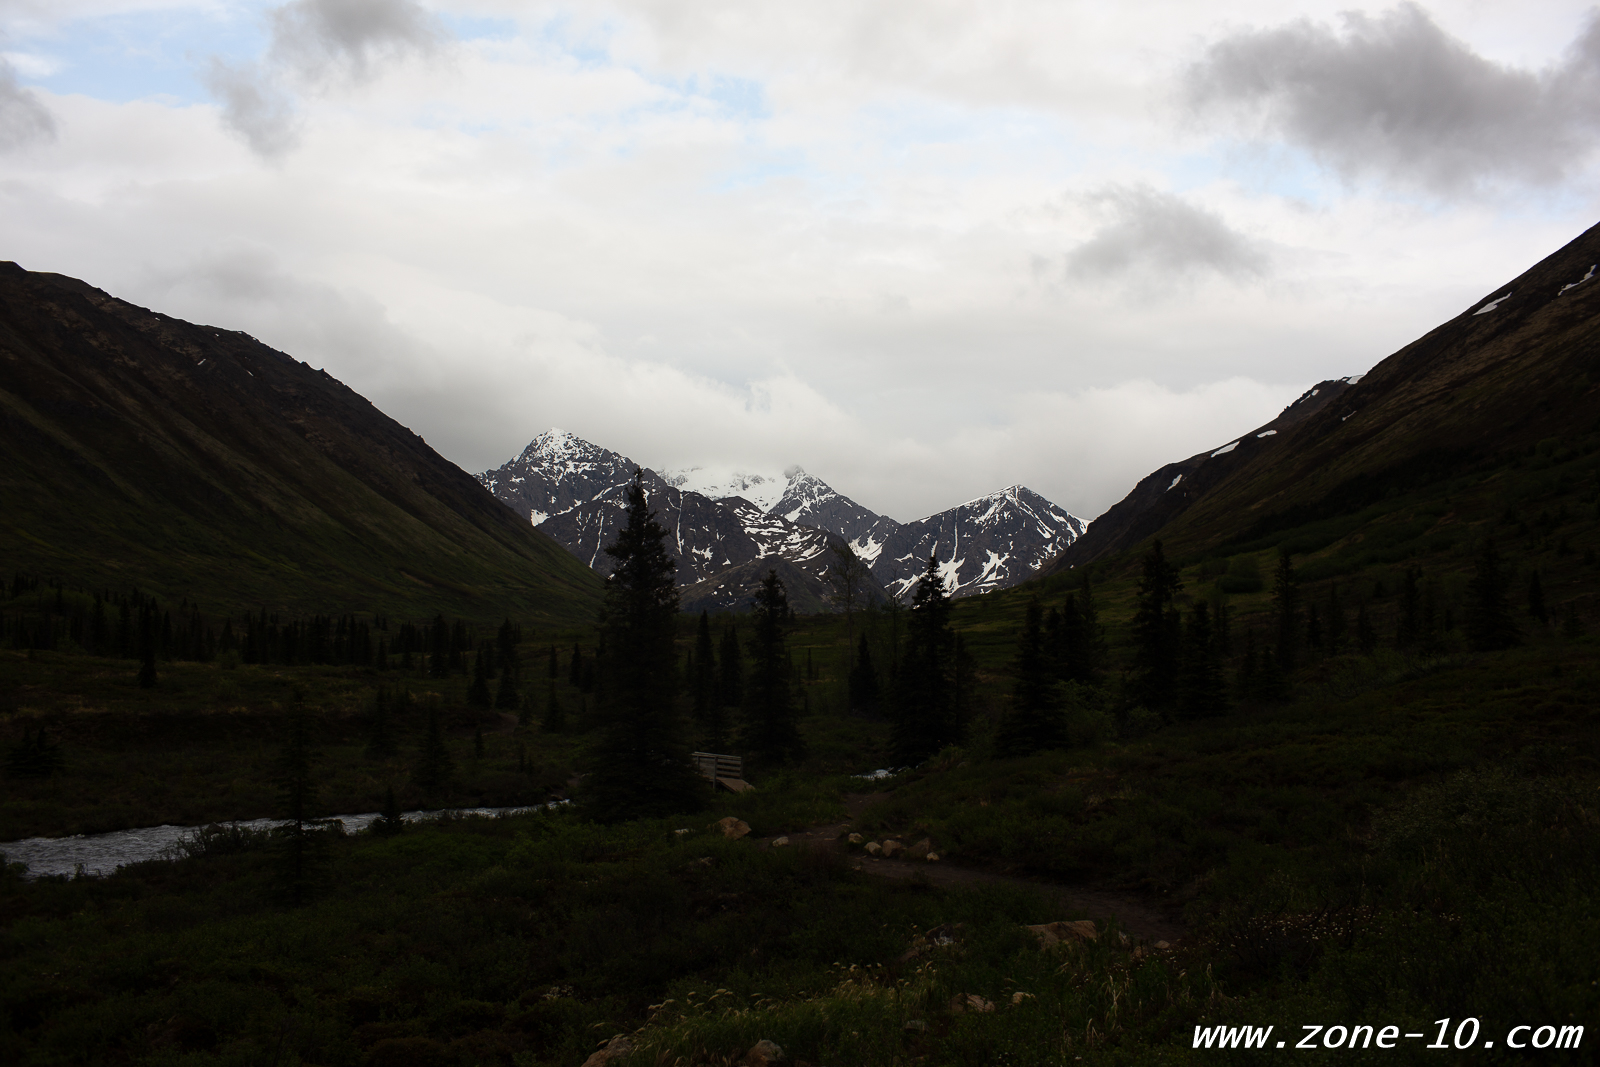
The art of editing a photograph is just that, an art. There are no formulas, only basic guidelines. The "Rule of Thirds" is an example that comes to mind. These days, there are a lot of people demonstrating editing techniques with Youtube videos on how to get the most out of your images in Lightroom and Photoshop. While I am tempted to do the same, and I will, to some extent, let's take a look at the original, unedited, uncropped version.
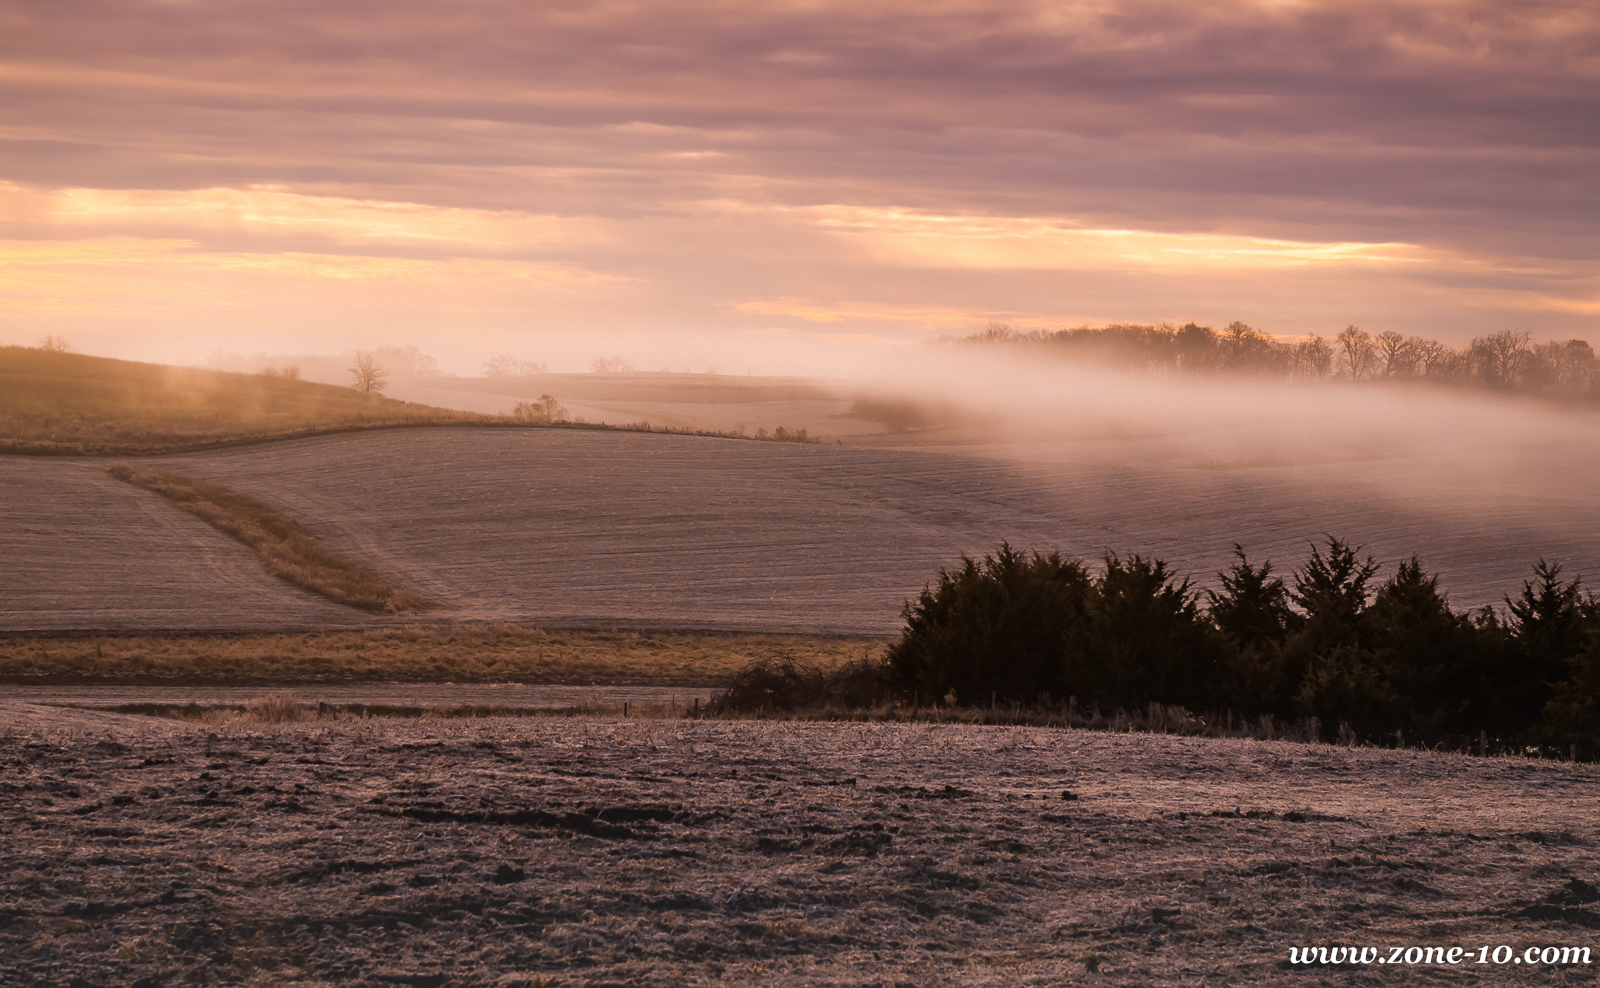
Clearing Fog - Unedited Version
The hazard to showing you this is that you would be tempted to process and edit the picture entirely differently. That's perfectly acceptable. In fact, this is the third time I've published this very photograph and each time it has been different. But this time I wanted to give a little background to the thought process that went into THIS particular version. One thing to keep in mind is that your VISION of how to present an image may not be wrong, but the actual mechanics involved in presenting that vision may be wrong. This is why there are general guidelines to follow. I'm not saying that this is the best or only way to edit this image, but I am saying that it was my vision for this image on January 3, 2016. It may be different two days from now.
All editing was done in Adobe Lightroom CC 2015.
Do keep in mind that editing is an iterative process. Just as a chef will taste test the soup and add a touch of salt late in the cooking process, so editing images is the same. You'll get to the end and discover that a pinch of visual salt back in stage one is required.
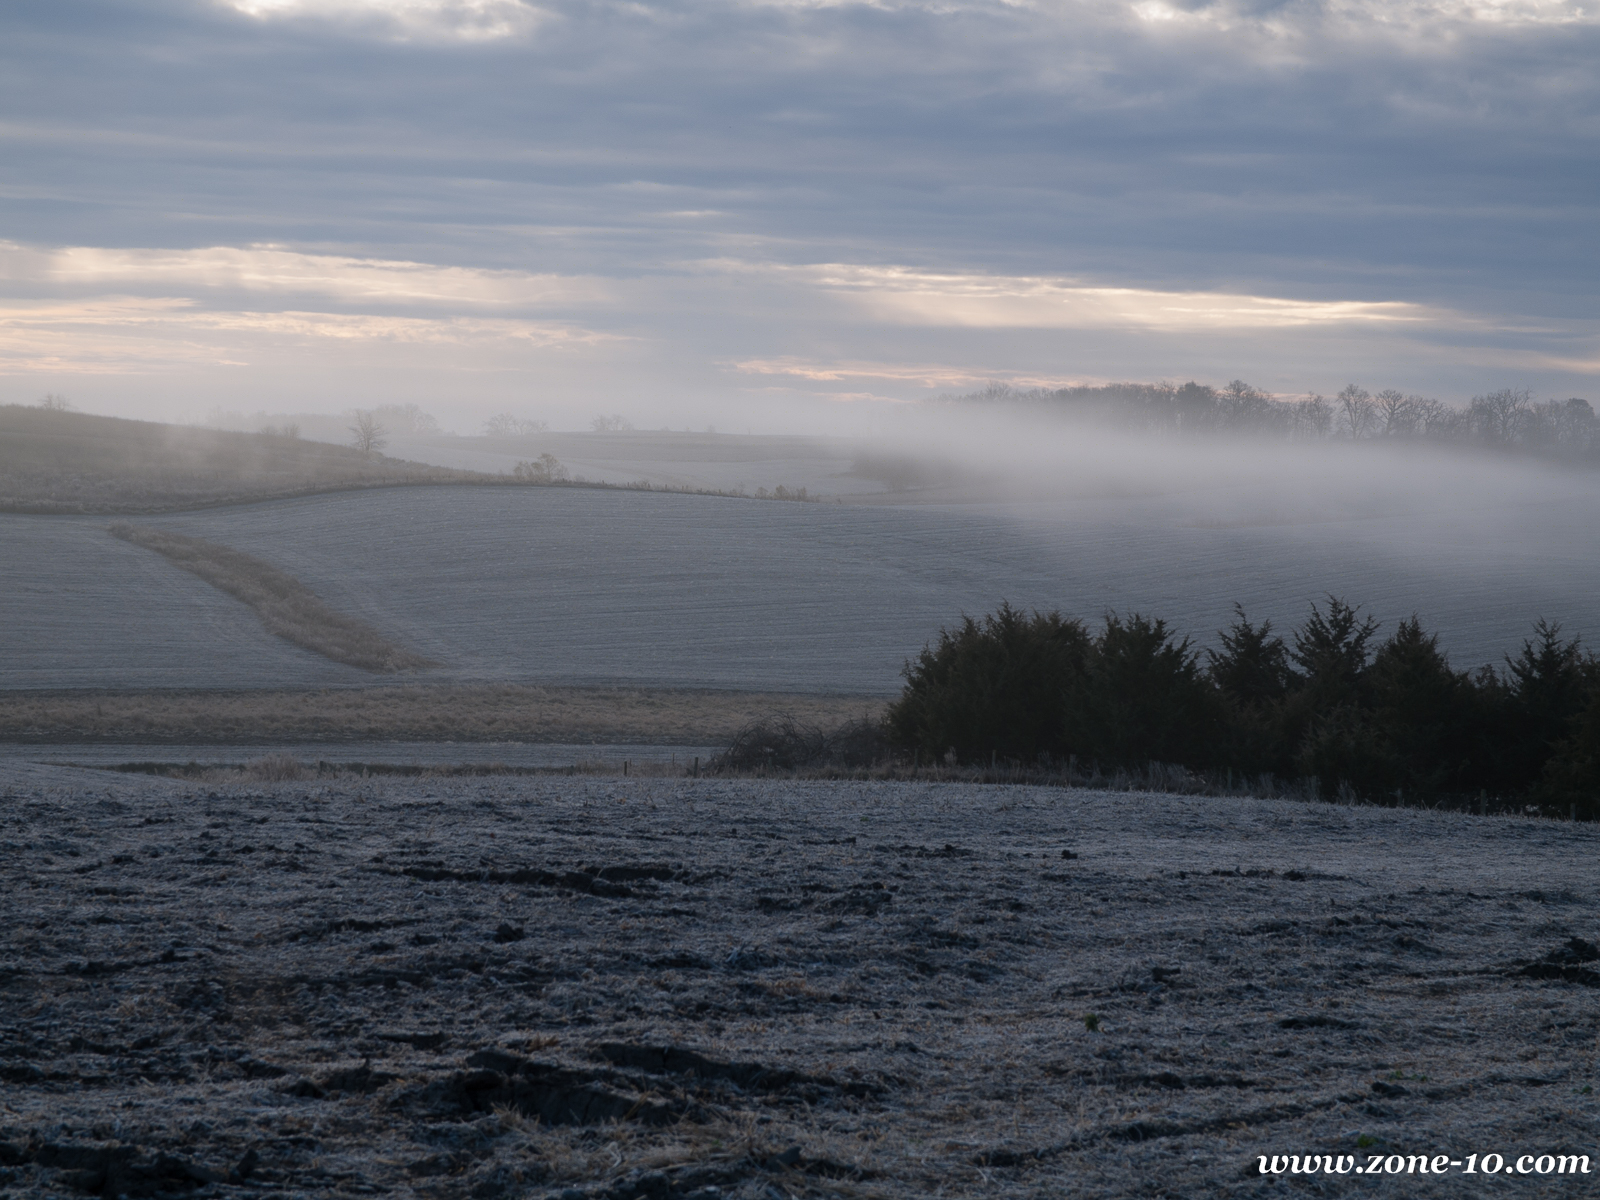
Tonal Adjustment - Overall Brightness and Contrast Interpretation
First thing to do is an initial tonal adjustment. This is done by pulling the Highlight slider back a little and moving the Shadow slider up. This decreases the contrast in the highlights and shadows. I then increased the Contrast which essentially pulled the midtones apart and gave the overall image some snap. I did add a little bit of Clarity and DeHaze at this stage to give the image bite. As the Highlight slider did very little on this image other than in the sky, I decided to bring it back up to normal and make that adjustment more localized later. I liked what it did to the sky, but not the rest of the image.
White Balance - Overall Color Interpretation
Second thing is I adjusted the White Balance. I started out with the "Shade" setting, but could have also used the "Shadow". To give it more sunrise look, I then increased the Tint towards magenta. Then I added some Vibrance and Saturation to louden the image up. I did go down into Lens Corrections and clicked on Remove Chromatic Aberration.
Detail Control - Noise Reduction and Sharpening
Third item was to adjust the Noise Reduction and Sharpening. The Panasonic DMC-L1, which I used for this image, will not perfectly convert in Adobe converters as you will get a bit of a maize pattern and also uniform black dots. It is important to work the Sharpening Detail and Masking sliders till the dots effectively disappear. There are times when they won't, so you may be called upon to do further editing heroics.
At this point, we have a choice. We can either crop the image, or do our localized editing. I recommend that you do all of your localized editing BEFORE cropping the image. This way, if you need to alter a crop, you don't have to correct your edits.
Localized Editing - Enhancing the subject of the photograph
Editing is my fourth item. There are six specific edits to this photo, which could have been done any number of ways, but this is what I did here. First, I placed a Graduated Filter down over the sky. With this filter, I increased contrast and pulled back the Highlights slider. I liked what the Highlight recovery slider did to the sky, but not the rest of the image, so I applied it here. I added a second Graduated Filter over the foreground and pulled back the exposure and lifted the blacks. I wanted to make the fog more prominant, as the other edits really reduced it, so I added an Adjustment Brush in the band of fog and pulled the Highlights slider up. I had tried various adjustments, including Exposure, Contrast, Whites, Clarity, and so forth, but in this specific case, just lifting up the Highlights slider did what I wanted it to do. A second Adjustment Brush was placed over the trees and I pulled the Shadows slider back. Again, it was just the one tool that accomplished the task THIS TIME, but could have been any of the other sliders on another image. A third Adjustment Brush was placed over the entire middle distance of the image and I increased Clarity and Dehaze sliders to get this middle range to better match the rest of the image. A final Adjustment Brush was placed over the grassy areas and I adjusted the Temp +6 and Tint -6 to put a tiny bit of green back into the grass.
Cropping - Presentation and Eye-Flow Control
Finally, the image was cropped. I removed a little bit of sky and a lot more of the bottom. Using the "Thirds" marks in Lightroom, I put the horizon at the top third and the horizontal line of grass and trees at the bottom third. While there are any number of ways you could crop the picture, this was what seemed to work this time for this image.